By Danny Lipford
When you remove a door from a wall, you can simply frame in the opening or convert the space to in-wall storage.
Once the old door unit is removed, add a treated 2-by-4 base plate between the existing studs. In this case, we’re adding scraps to block the opening a few inches. This allows base molding to continue under the storage space.
Next, we’re cutting pieces of clear 1-by-6 to frame our storage area. These are nailed in, flush with the stud edges in the room that will be blocked off. That leaves about an inch and a half extending past the drywall into the room where the storage will be needed.
This creates a 5-and-1/2-inch-deep box, about the size of the old doorway, that can be customized for whatever storage you need. It also creates a ledge in the room being closed off, on which to attach new drywall.
Once the drywall is in place, and the rooms are separated, you’ll need a back for your cabinet. We’re using a piece of beadboard paneling, but any type of finished plywood will work.
After the paneling is cut to size, apply construction adhesive to the back of the new drywall and press the paneling into place. Take care not to press too hard or you’ll create more work for yourself as we did.
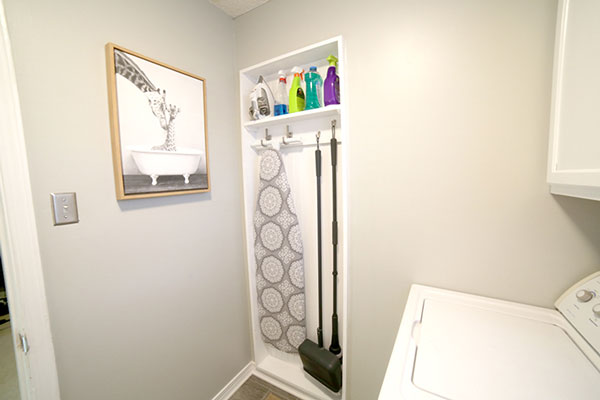
Now you can customize the old door space for whatever storage you need. We chose to simply add a single vertical 1-by-6 cleat for hanging the ironing board and brooms. On top of that, we added a horizontal 1-by-6 shelf, supported by small 1-by-1 cleats, that will hold the iron and other laundry supplies.
After a little paint, the storage space is both attractive and useful.
Watch the video for details.
For more information, visit TodaysHomeowner.com.


